
Working with a Project
The following operations are available for each project:
The following operations are available for each project:
- Pin (the ________ icon) – it pins the project to the top of the general list;
- Edit (the ________ icon and then the ________ button);
- Duplicate (the ________ icon and then the ________ ________ button) – it saves all project data to a new project with a new ID;
- Archive (the ________ icon and then the ________ ________ button) – it moves the project to a separate "Archive" section;
- Delete (the ________ icon and then the ________ ________ button) – it deletes the project from the system.


Platform: PJCOM.Space
Operator Manual
Abstract
In this document, "software" refers to the Platform: PJCOM.Space software, the copyright holder of which is PJ Project, LLC.
This document has been prepared to provide information for the preparation of an application for inclusion of software information in the Unified Register of Russian Computer Programs and Databases.
Introduction
This document contains: a brief guide to using the software.
This document contains: a brief guide to using the software.
Software Purpose
Platform: PJCOM.Space is a system designed for the professional design, planning, and visualization of conference rooms and events. It is designed for hotels, business centers, conference centers, restaurants, museums, and event agencies that require an effective tool for transforming empty space into a precise, functional, and visually appealing event plan.
Platform: PJCOM.Space is a system designed for the professional design, planning, and visualization of conference rooms and events. It is designed for hotels, business centers, conference centers, restaurants, museums, and event agencies that require an effective tool for transforming empty space into a precise, functional, and visually appealing event plan.
System Registration
The PJCOM.Space platform software is implemented using the SaaS (Software-as-a-Service) model, providing remote access to the software over the internet. The SaaS model allows for the use of the software without transferring a copy to the end user, nor does it allow downloading the software distribution and installing it, in whole or in part, on the user's equipment.
To access the software, users must log in to the pjcom.space website using a unique password and login to register in the system.
To obtain a login and password, users must send a request to info@pjcom.ru.
Upon registration, each client is also assigned a fixed set of facilities and rooms. For the purposes of this example, the Promo Hotel and three rooms are included.
Figure 2. Main interface
Figure 8. Hall plan
Figure 9. Menu for working with the hall plan
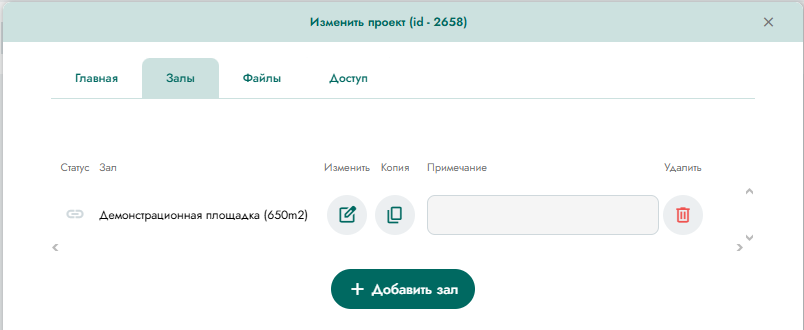
Figure 7. Hall management
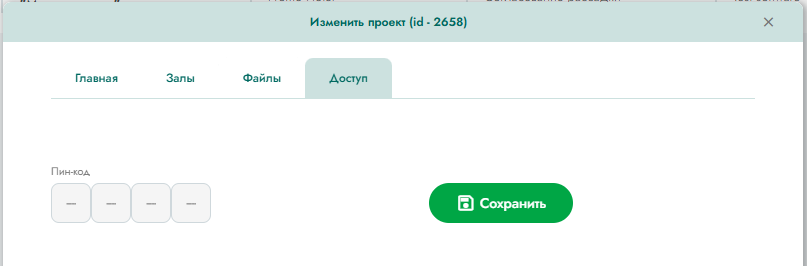
Figure 6. Access control
Figure 3. Creating a project
The main interface contains a list of projects that can be sorted by each parameter (the ________ icon next to the field name).
Also on this tab, the hall can be duplicated (icon ________) or deleted (icon ________).
On the hall management tab (the ________ icon and then the ________ ________ button or the ____________ button), you can access the hall plan (Figure 8). The buttons are identical in their plan visualization function, and differ only in whether plan editing mode is available.
Working with a plan
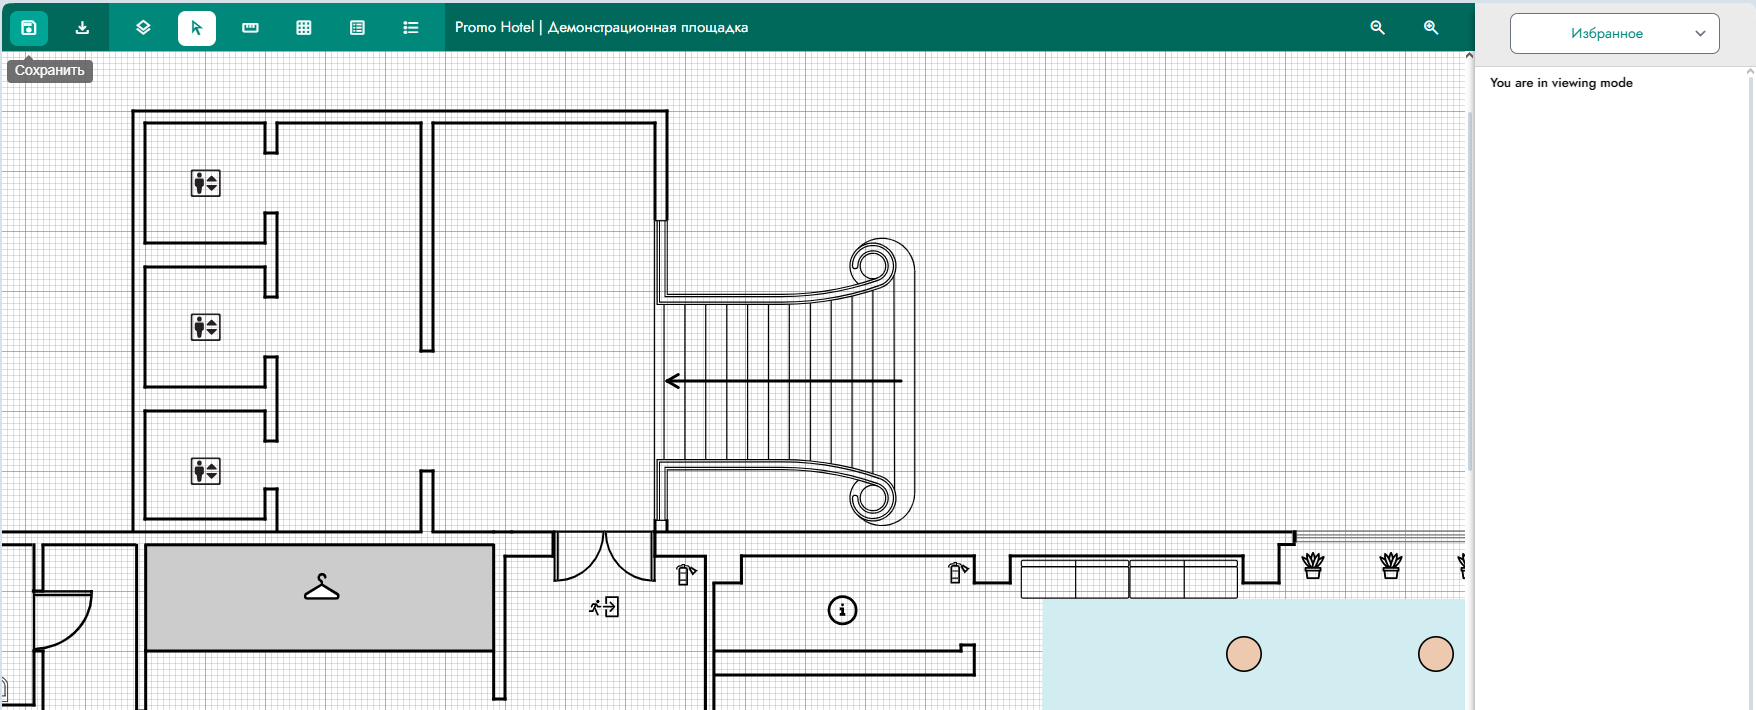
In the hall plan editing mode, the tools are grouped in the top menu (Figure 9).
In the hall plan editing mode, the tools are grouped in the top menu (Figure 9).
In the hall plan viewing mode, the same elements are available, except for the editing elements (Figure 12).
Logout
To log out, select the ________ icon and then press the button.
To log out, select the ________ icon and then press the button.
Working with an Account
The user can edit the password for their current account. To do this, select the icon, ________, then click the ________________ button. In the form that opens (Figure 14), the user can set a new password, provided they remember the current one. If the current password is lost, the user can use the password recovery mechanism by clicking the "Forgot Password" link on the authorization form (Figure 1).
The user can edit the password for their current account. To do this, select the icon, ________, then click the ________________ button. In the form that opens (Figure 14), the user can set a new password, provided they remember the current one. If the current password is lost, the user can use the password recovery mechanism by clicking the "Forgot Password" link on the authorization form (Figure 1).
Project Archive
You can access projects sent to the archive (see the "Working with a Project" section) by clicking the ________________ button in the upper right corner of the main interface. You can return to the main list of projects by clicking the ________________ button in the same location. Working with a project in this list is similar to that described above, except that you can return a project from the archive to the main list. To do this, select the ________ icon next to the desired project and then click the button.
You can access projects sent to the archive (see the "Working with a Project" section) by clicking the ________________ button in the upper right corner of the main interface. You can return to the main list of projects by clicking the ________________ button in the same location. Working with a project in this list is similar to that described above, except that you can return a project from the archive to the main list. To do this, select the ________ icon next to the desired project and then click the button.
Changing Object Images
The list of objects, rooms, furniture, and equipment models is fixed, but the user can change their appearance by uploading a corresponding photo. To do this, select the _________ icon, then click the ________________ button. In the form that opens (Figure 13), you can add multiple photos to each object by clicking the corresponding button, add a text description (where applicable), and delete unwanted photos.
The list of objects, rooms, furniture, and equipment models is fixed, but the user can change their appearance by uploading a corresponding photo. To do this, select the _________ icon, then click the ________________ button. In the form that opens (Figure 13), you can add multiple photos to each object by clicking the corresponding button, add a text description (where applicable), and delete unwanted photos.
The user has access to tools corresponding to the elements:
- list of rooms;
- saving the plan;
- downloading the plan (in JPG, PNG, or PDF formats) or a list of objects on the plan (in XLS format);
- settings (color, thickness, line type);
- selecting layer visibility;
- "Cursor" selection mode;
- "Area" selection mode;
- "Line" drawing mode;
- "Arch" drawing mode (with appropriate parameters to select);
- text insertion mode (with appropriate parameters to select);
- color fill mode (with appropriate parameters to select);
- text insertion mode (with appropriate parameters to select);
- geometric shape insertion mode;
- arrow insertion mode (with appropriate parameters to select);
- alignment selection mode;
- roulette mode;
- grid display toggle;
- additional element insertion mode;
- used object list display mode;
- "Undo" and "Redo" tools;
- zoom control tools.
Editing a Project
You can enter editing mode either by explicitly clicking the corresponding button (see the "Working with a Project" section) or by simply left-clicking the corresponding project in the general list. Selecting project editing mode opens a window with editable main fields (Figure 4), a form for attaching files (Figure 5), a form for setting an access password (Figure 6), and a form for managing rooms (Figure 7).
You can enter editing mode either by explicitly clicking the corresponding button (see the "Working with a Project" section) or by simply left-clicking the corresponding project in the general list. Selecting project editing mode opens a window with editable main fields (Figure 4), a form for attaching files (Figure 5), a form for setting an access password (Figure 6), and a form for managing rooms (Figure 7).
Creating a Project
To create a project, click the button.
A data entry form will open (Figure 3). In this form, you must fill in the "Name" field, select one of the possible properties (hotels) (specified during registration), and select one of the rooms within the selected property (working with rooms is described below).
System Authorization
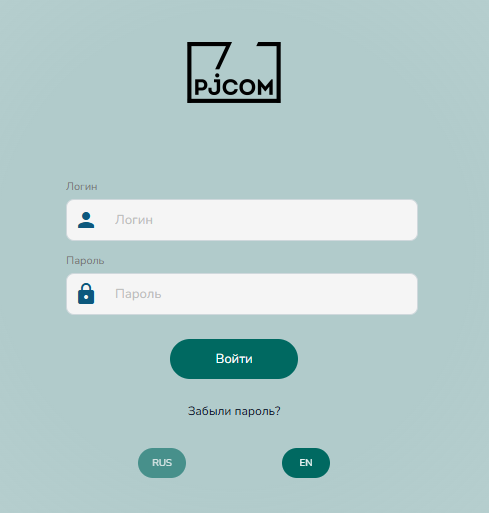
To log in to the system, the user must click the link provided by the copyright holder. The authorization form displayed to the user is shown below (Figure 1).
After authorization, the user is taken to the main software interface (Figure 2).
To log in to the system, the user must click the link provided by the copyright holder. The authorization form displayed to the user is shown below (Figure 1).
After authorization, the user is taken to the main software interface (Figure 2).

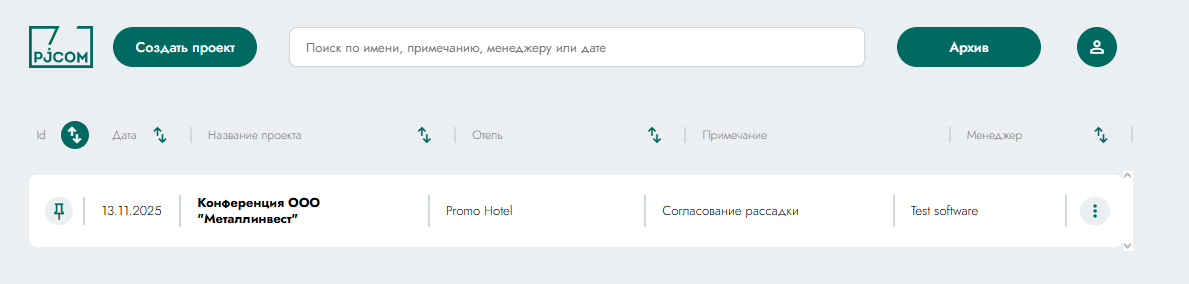


Figure 5. Working with files
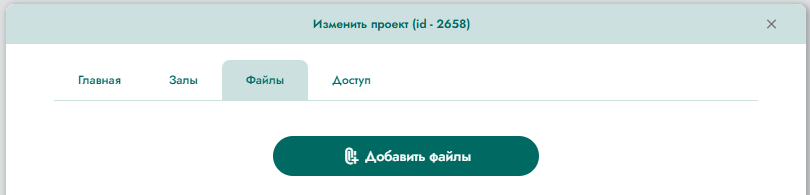
Figure 4. Editing basic parameters
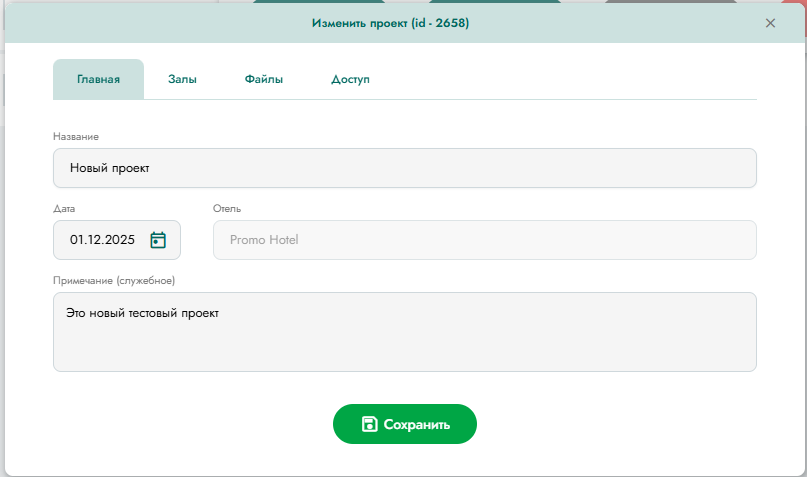
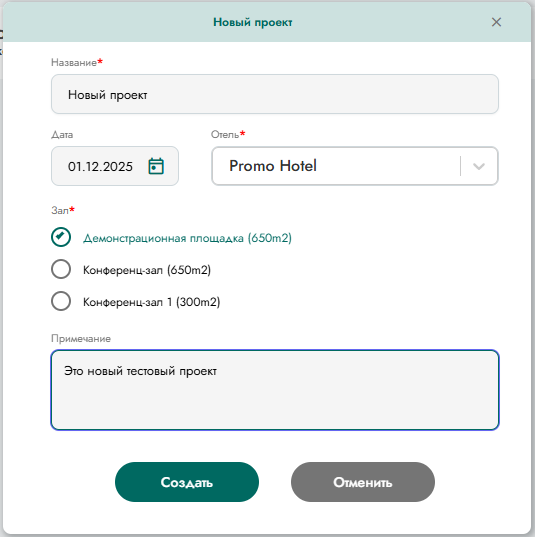
Figure 13. Working with images of objects


Figure 13. Working with images of objects

Figure 12. Menu for working with the hall plan

Figure 11. Parameters of objects on the plan
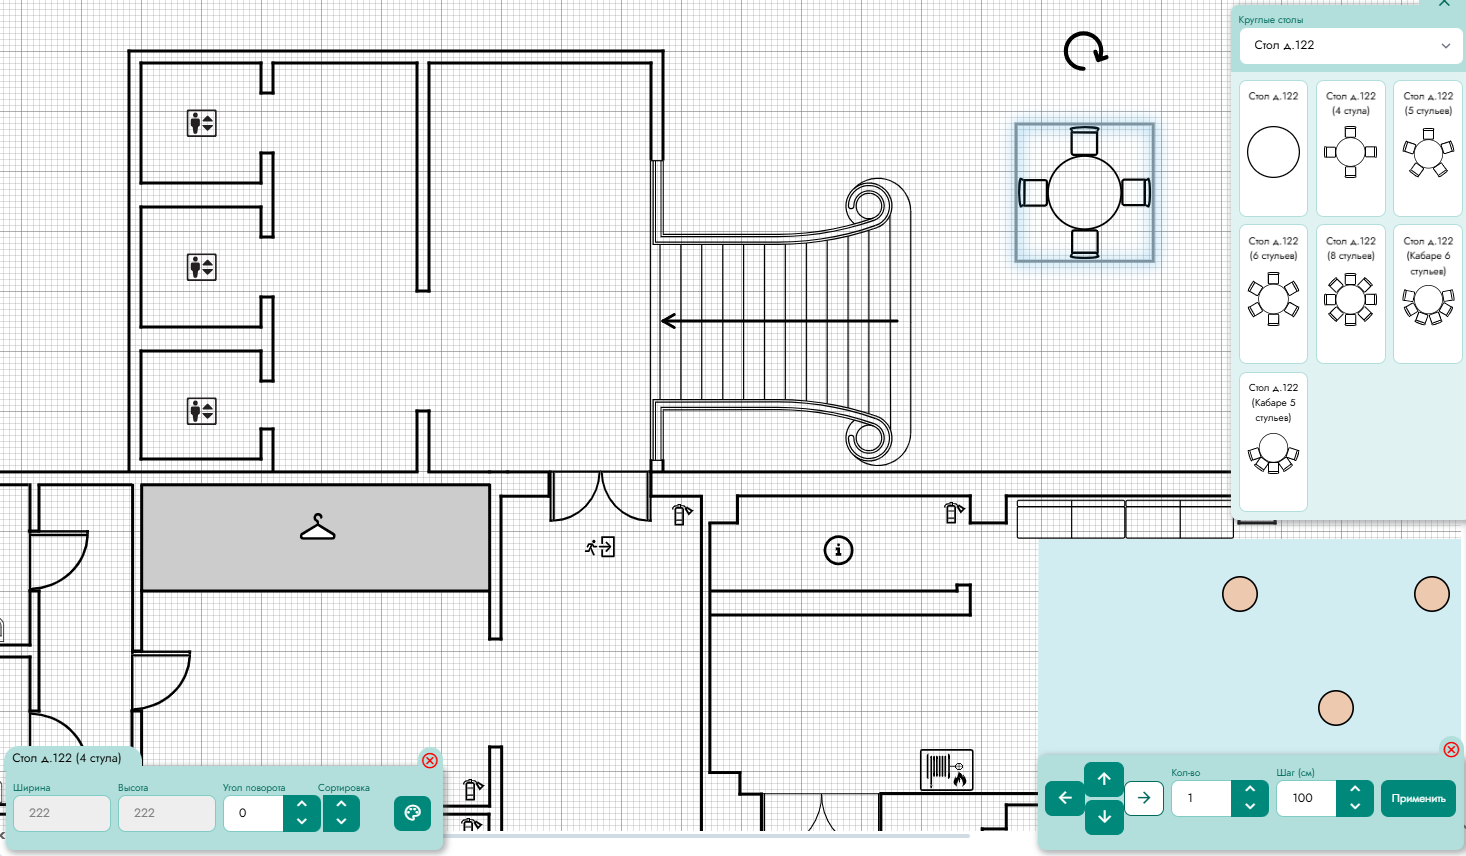
Figure 10. Selecting objects for the plan
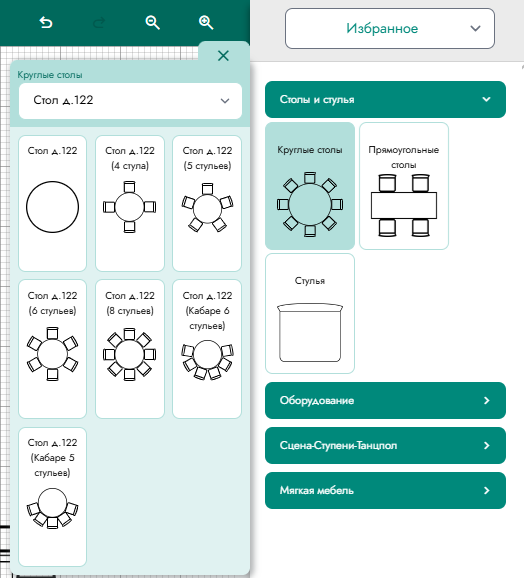
Figure 1. Authorization form


Our products
Legal information
Contacts
+7 962 945 88 00
info@pjcom.ru
Office 402, 9/3, Dmitrovskoe sh., Moscow
© 2025 PJCOM. All rights reserved.

demo Request
Our specialist will schedule a call with you, demonstrate our products in action, offer a customized solution, find the best value, and discuss the next steps in cooperation

We use cookies to make our website better.
Subscribe to our newsletter
Subscribe to our newsletter to stay informed about key changes, trends, and indicators of the MICE market